WordPress Manager is a utility to Manage all your WordPress installation in one place. WordPress Manager allows you to update several settings for your WordPress installation without even having to login to WordPress admin panel.
HOW TO ACCESS THIS AREA
1. Log into your hosting control panel and click on Softaculous under the software section.

2. Click on the WordPress icon in the top right hand corner.

3. Select the site you are hosting that you wish to manage.

Auto Login to WordPress admin panel
Click on the “Login” button next to your site url to automatically login to your WordPress panel as admin user without having to enter the password.

Upgrade Installation
If your installation has an update available you will see the “Upgrade Now” button next to the version number. Just hit that button and it will take you to the upgrade page.

Auto Upgrade Core Settings
Choose your auto upgrade settings for WordPress core. You can choose from the following options and Softaculous will perform the updates accordingly:
1. Do not Auto Upgrade
2. Upgrade to Minor versions only (i.e. 5.5.1 will be upgraded to 5.5.x and not 5.6.x)
3. Upgrade to latest version available Major as well as Minor (i.e. 5.5.1 will be upgraded to 5.5.x until there is a new major version available and 5.6.x when available)
Just choose your preference and it will be automatically saved and you will see a success message.
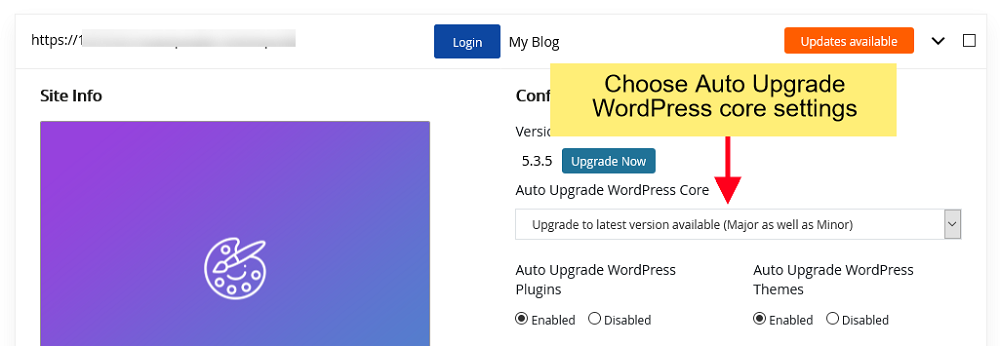
Auto Upgrade Plugins/Themes Settings
Choose to enable/disable Auto Upgrade for Plugins or Themes. If you enable Auto Upgrade plugins or themes, updates will be checked once every 24 hours and will be upgraded. Just tap on Enable/Disable button and it will save the preference and you will see the success message.

Enable/Disable Search Engine Visibility
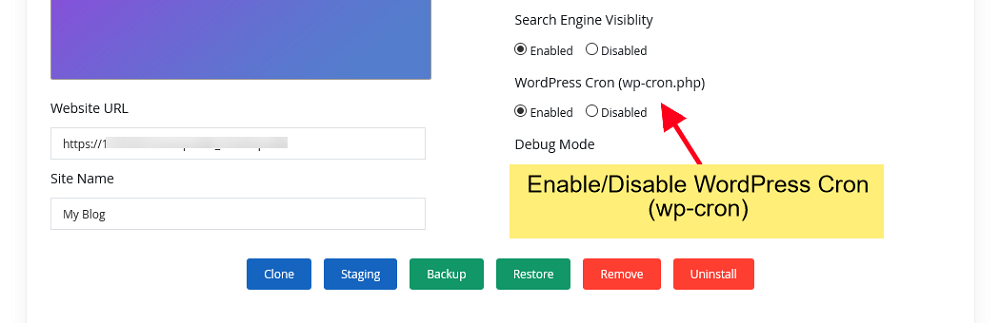
The Search Engine Visibility setting in WordPress Reading options can also be customized. If you are cloning your live site to a dev site or your website is still not complete and you do not want Search Engines to index your site you can set this setting as disabled. If you want Search Engines to index your site you can enable this setting. Just tap on Enable/Disable button and it will save the preference and you will see the success message.

Enable/Disable WordPress CRON
By default WordPress has a CRON job enabled which performs various tasks on your site. Sometimes with huge sites this can consume your server resources. If you would like to enable/disable this wp-cron setting you can tap on Enable/Disable button and it will save the preference and you will see the success message.
Enable/Disable WordPress Debug Mode
WordPress debug mode (disabled by default) is very useful if you run into any issues on your site and want to know the reason. You can enable/disable the debug mode from Softaculous WordPress Manager. Just tap on Enable/Disable button and it will save the preference and you will see the success message.
Note: It is not recommended to leave debugging mode enabled on your production site. On production site disable debug mode once you have finished debugging.

Change Website URL
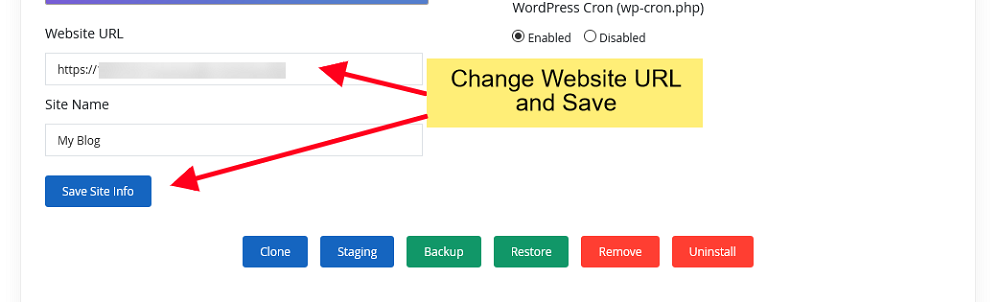
The Site URL for your website can be changed from Softaculous WordPress Manager. If you have changed the site URL from your WordPress admin panel to something invalid and you are locked out from your panel you can revert it from Softaculous WordPress Manager. Change the “Website URL” value in the field and hit the “Save Site Info” button. The URL will be changed in your WordPress database as well.
Change Site Name
The Site Name for your website can be changed from Softaculous WordPress Manager. Change the “Site Name” value in the field and hit the “Save Site Info” button. The Site Name will be changed in your WordPress database as well.

Change Password
Forgot Password for your account on your WordPress site? Or want to reset the password for a user?
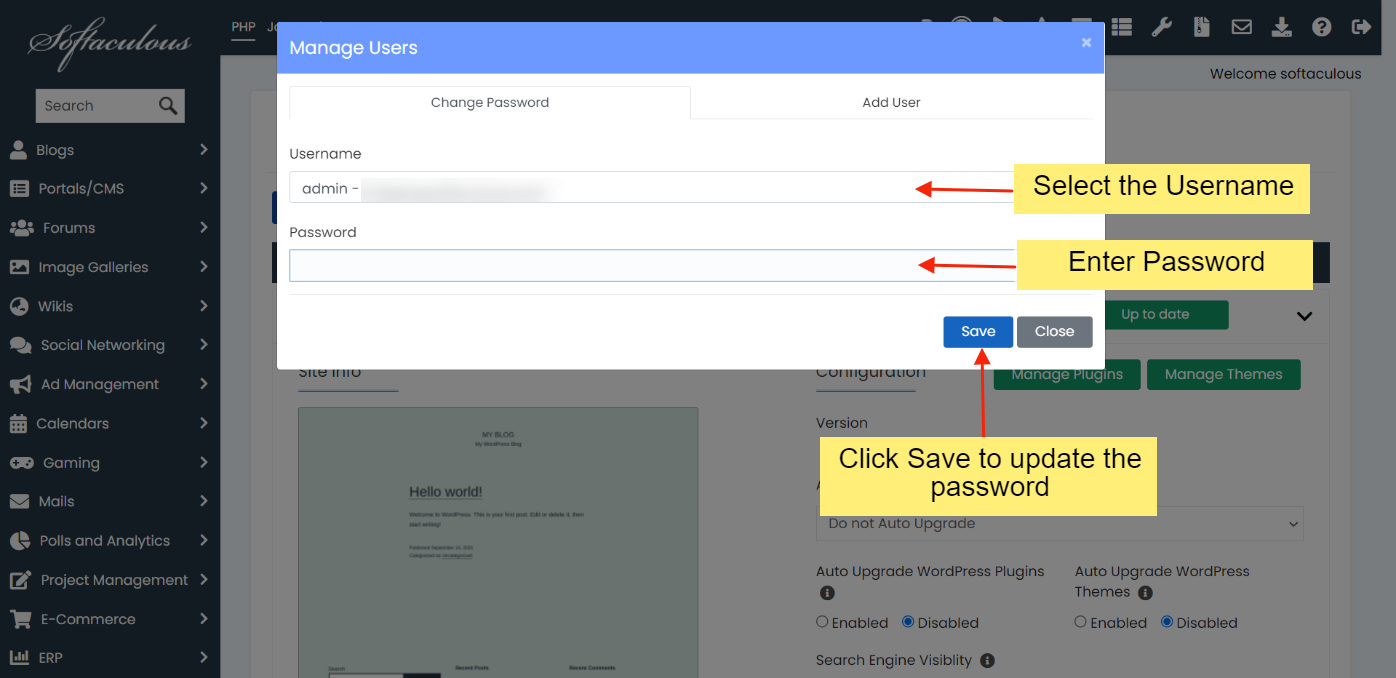
Change the Password for any user account on your WordPress site from the Softaculous WordPress Manager page.
- Go to Manage Users Utility

2. Select the Username and enter the New Password you want to use.
Manage Plugins
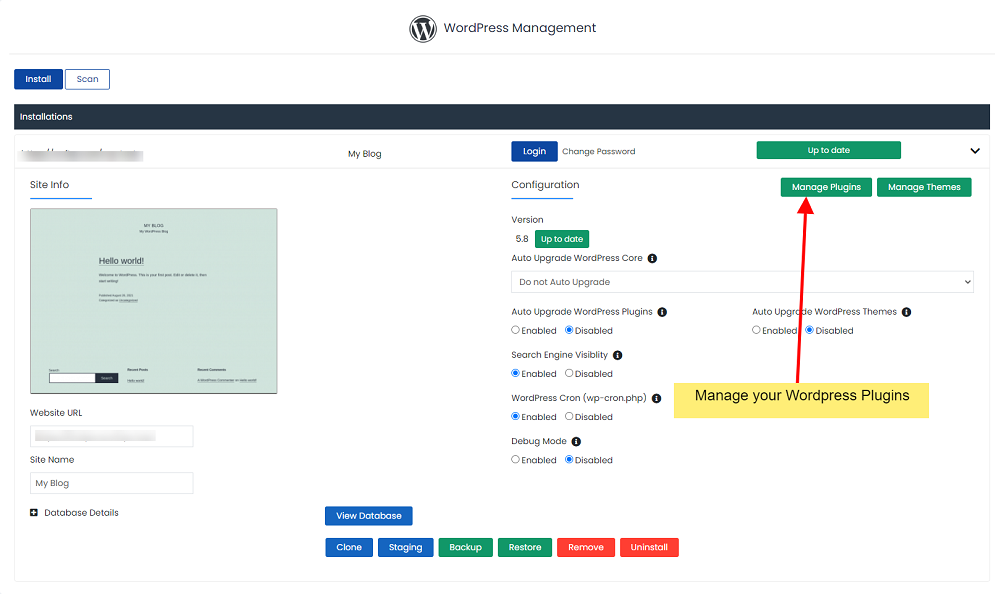
Installed
The “Installed” section shows you the list of all the installed plugins in your WordPress installation. You can Activate/De-activate and Delete plugins accordingly.

Add Plugins
The “Add Plugins” section allows you to search for and install any plugin from wordpress.org . The selected plugins are automatically activated upon installation.

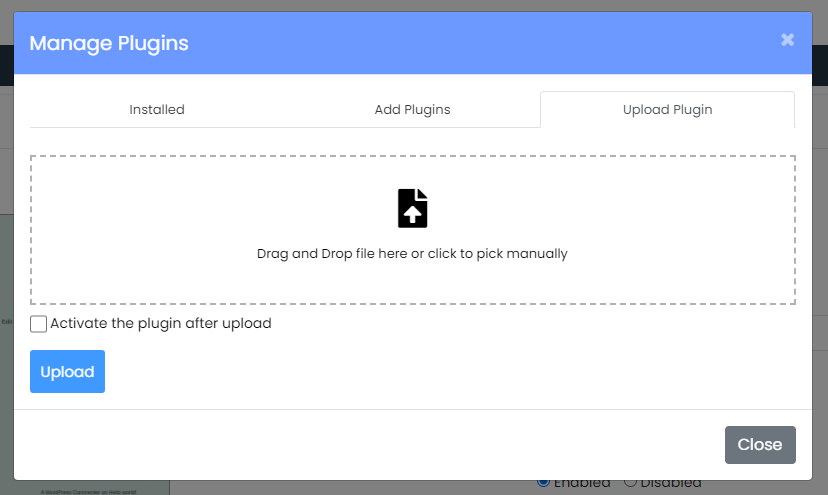
Upload Plugin
The “Upload Plugin” section allows you to install a plugin by uploading it’s zip file.
Manage Themes
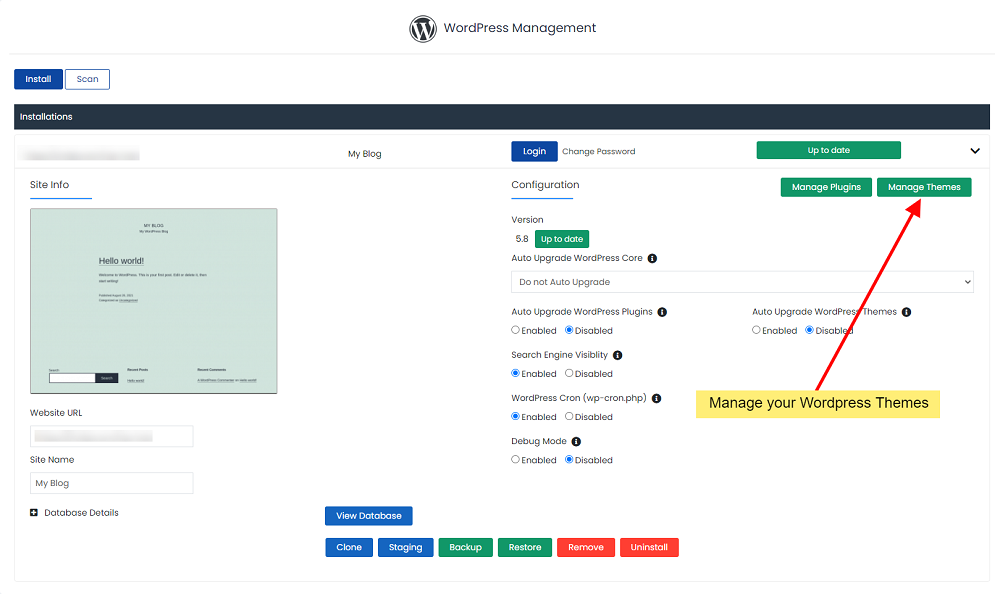
Installed
The “Installed” section shows you the list of all the installed themes in your WordPress installation. You can Activate/De-activate and Delete themes accordingly.

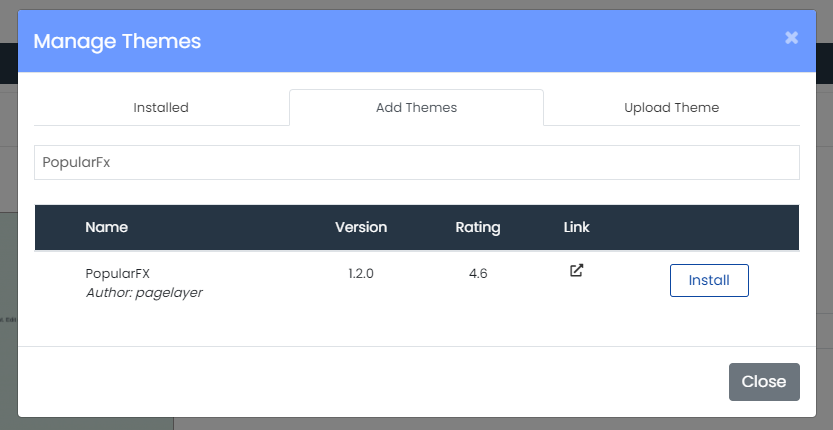
Add Themes
The “Add Themes” section allows you to search for and install any theme from wordpress.org. The selected themes are automatically activated and replace the previously activated theme upon installation.
Upload Theme
The “Upload Theme” section allows you to install a theme by uploading it’s zip file.

Add User
Do you want to add new users like Editors, Authors to your blog?
WordPress Manager by Softaculous comes with an in-build tool to Add WordPress users with different roles.
- Go to Manage Users Utility

2. Click on Add user tab
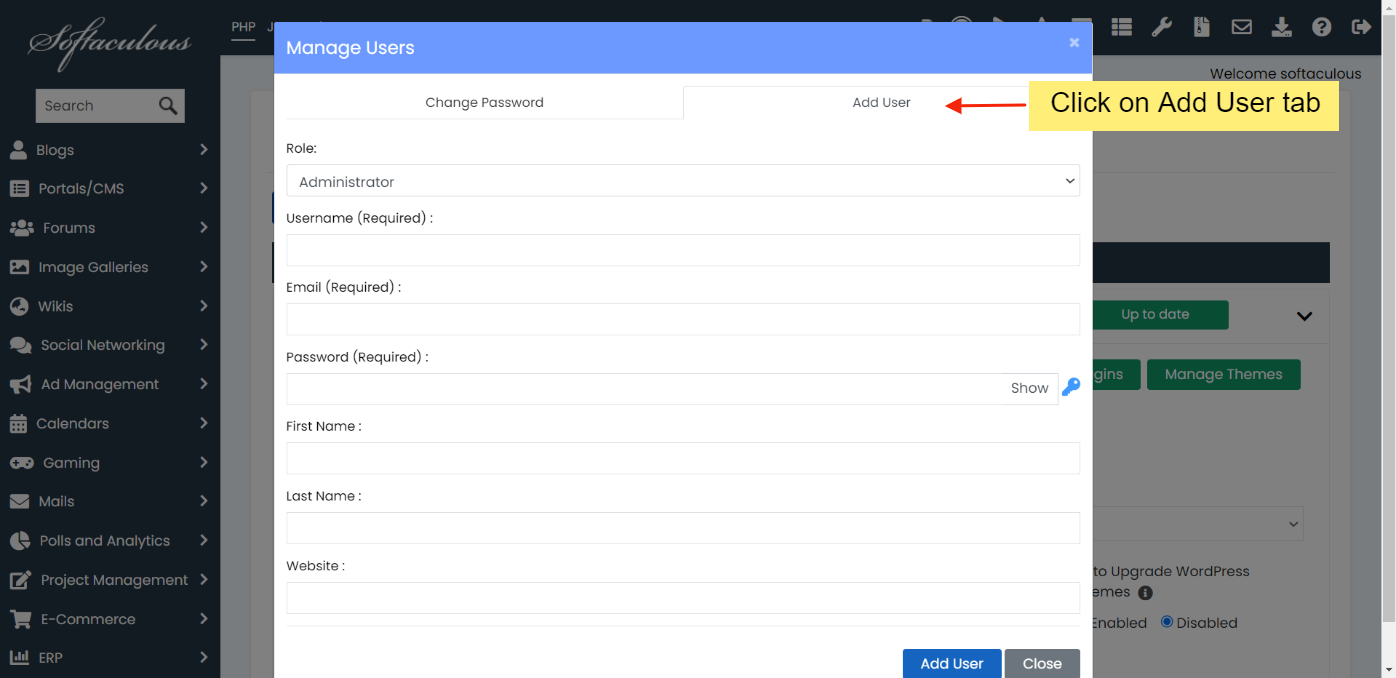
3. Select the User role you want to add and fill in the required details
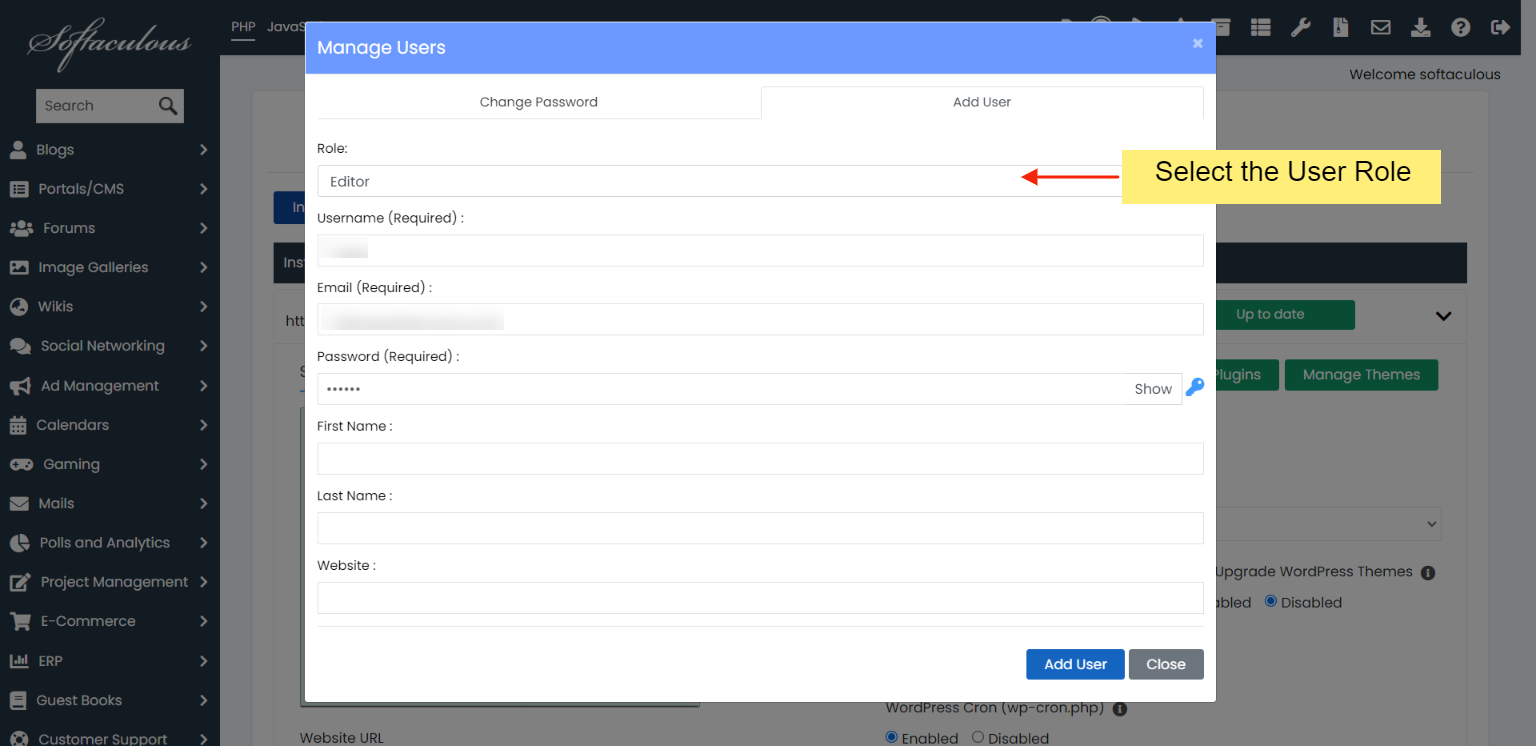
4. Click on Add user. That’s it the new user will be added in the WordPress.
More Features will be added to WordPress Manager in the upcoming versions.
Was this article helpful?
That’s Great!
Thank you for your feedback
Sorry! We couldn't be helpful
Thank you for your feedback
Feedback sent
We appreciate your effort and will try to fix the article